Friday, August 29, 2014

Decadent Garlic Bread - Fancy Trashy Food

There are a thousand different versions of garlic bread. There's a Paula Deen style recipe with mayonnaise and cheddar cheese that is more like a sandwich than it is a side dish. Then there's the other end of the spectrum that I described in my post about garlic. You take a slice of good crusty Italian bread, grill it over high heat, then rub it with a fresh clove of garlic, and brush with a little olive oil. So simple, but so perfect!! 

This recipe falls somewhere in between. It's cheesy and buttery and decadent, but it's made with ingredients that you would expect to see in "garlic bread" i.e. no mayo and no yellow cheese.

Disclaimer: this is also where you see my frugal side come out. I wanted to make the garlic bread and had most of the ingredients... except the bread. But what I did have were some brioche hamburger buns in my freezer. So I made do. It looks a little silly, but don't judge - they were delicious!!

You'll start out by roasting a head of garlic following the technique that I described in my All About Garlic post


These roasted cloves will be the base for the topping for our decadent bread. Other ingredients you'll need are grated parmesan cheese, Italian Seasoning (herbs only, no sodium), olive oil, salt and pepper.

Start out by squeezing the roasted garlic out of each of the cloves, and then mashing it into a paste with a fork. Please avoid eating all of this roasted garlic deliciousness with a spoon... it will certainly be tempting. 


After you have your roasted garlic paste, you'll add in the other ingredients. To make 2 buns' worth of topping (2 halves each, so 4 total pieces) I used about 1/3 cup of Parmesan cheese, 1 tbsp oil, 1 tbsp butter, and a dash of salt and pepper. You don't need too much butter or oil because the roasted garlic has a lot of moisture, and as the bread bakes the cheese will give of some oil too. But you do need some!! 

Continue mashing with your fork until all ingredients are combined, then top your bread (or buns as it were) and pop them into a 350 degree oven.


I like to bake them until the topping starts to get a little golden, but you also need to make sure that the bread is getting heated too so that it becomes crispy on the bottom, as good garlic bread should be. So just watch it closely so that your each that balance. If the bottom of the bread seems to be browning/crisping too fast and the topping hasn't melted and turned golden, then switch to the broiler so that the top gets the finishing touch. If the top is getting too browned and the bottom isn't browning quickly enough, then move your oven rack down one or two positions. As I keep saying all ovens are different, so play this one by ear. But trust me, the results will be WELL worth it!! 


Behold! My decadent, frugal, borderline trashy but still sorta fancy over-the-top roasted garlic bread... I mean buns. Seriously, don't judge.

Wednesday, August 27, 2014

Wednesday's GHI: Cast Iron Skillet

I love my cast iron pan, and for most protein I cook it is definitely my go-to. The key with cast iron is that it needs to be properly cared for. So for today's Gotta Have It, I'll tell you why I love my cast iron pan, and what I do to make sure it treats me right. If you don't have one, you should get one. They're not that expensive, but are so incredibly versatile. You can use it on the stove, in the oven, on the grill, at a camp site - they are indestructible, and so easy to maintain as long as you do it right. 

The usefulness of a cast iron pan comes in its weight. Because it is such a heavy-bottomed pan, when you preheat it for long enough, you get incredibly even heat distribution. This means that if you're cooking chicken breasts, you're not going to have hot spots and cool spots in the pan, the whole thing will be hot. Because of this even heat distribution and the fact that it holds heat well, this makes it wonderful for frying. You won't get as big of a drop in temperature when you put your foods in to fry (usually if you heat oil in a normal pan, you drop in your items to be fried, and the oil will drop in temperature, sometimes significantly! With cast iron, because the pan itself retains so much heat, it helps keep the oil more evenly hot even when you drop your food in). This means that your food will be less greasy, as you'll have less temperature fluctuations with the oil. The other great use for cast iron is cooking anything for people who are iron deficient. When cooking in a cast iron pan, it actually imparts a little bit of iron into the food that you cook into it. Unless your doctor is concerned about you getting too much iron, this is not a problem. For most people, it's actually a bonus because a lot of us don't get enough iron in our diets.

Caring for your cast iron pan is very important but also very easy. When you get it, the first thing you need to do is season it. This does not mean adding salt and pepper, it means baking a layer of oil onto the entire surface of the pan. This actually gives it a natural non-stick coating, and also protects it from rusting. 

To season your pan, choose an oil with a high smoke point (plain vegetable or canola oil, do not use olive oil for this). Dab a paper towel into the oil and rub the pan down inside and out - cover every surface of the pan with oil. Then put it in an EMPTY oven set to about 300 degrees, and bake it for several hours - 2 or 3 to start. I know it seems a little wasteful and you may be tempted to multi-task by putting something in the oven to cook while you're seasoning your pan, but resist that temptation. The steam created by any food cooking will mess up the process, so you need to just bite the bullet and only bake the pan in an otherwise empty oven. After baked for 2-3 hours, turn off the oven, let it cool (this will also take a couple of hours... remember how well cast iron retains its heat?), and repeat. You'll go through this process a couple of times, adding very thin layers of oil each time. When seasoned properly, this will become a permanent fixture of your cast iron pan. When you cook the first couple of times a little bit of it may come off, but it's nothing to worry about. 

Now that your pan is seasoned, it is relatively non-stick and ready to cook with! I love doing things in the cast iron that need to be started on the stove and finished in the oven. Any meat (chicken breasts, pork chops, steaks, etc), brussel sprouts (recipe to come), and also frying like I mentioned. If properly seasoned, you can cook with anything, even acids. I love making a pan sauce after cooking meat which typically involves deglazing the pan with wine or something else acidic. This is ok to do as long as it's been seasoned.

The key though is now that your pan is seasoned, you can NEVER LET SOAP TOUCH IT. EVER! May I repeat, do not ever use soap to wash a seasoned cast iron pan! Soap is a degreaser, which means that it will remove that layer of oil which you so painstakingly worked to bake on there. The solution is actually super easy and is another reason why I love using my cast iron pan - washing it is a breeze! All you need is table salt, and if necessary some iron wool. 

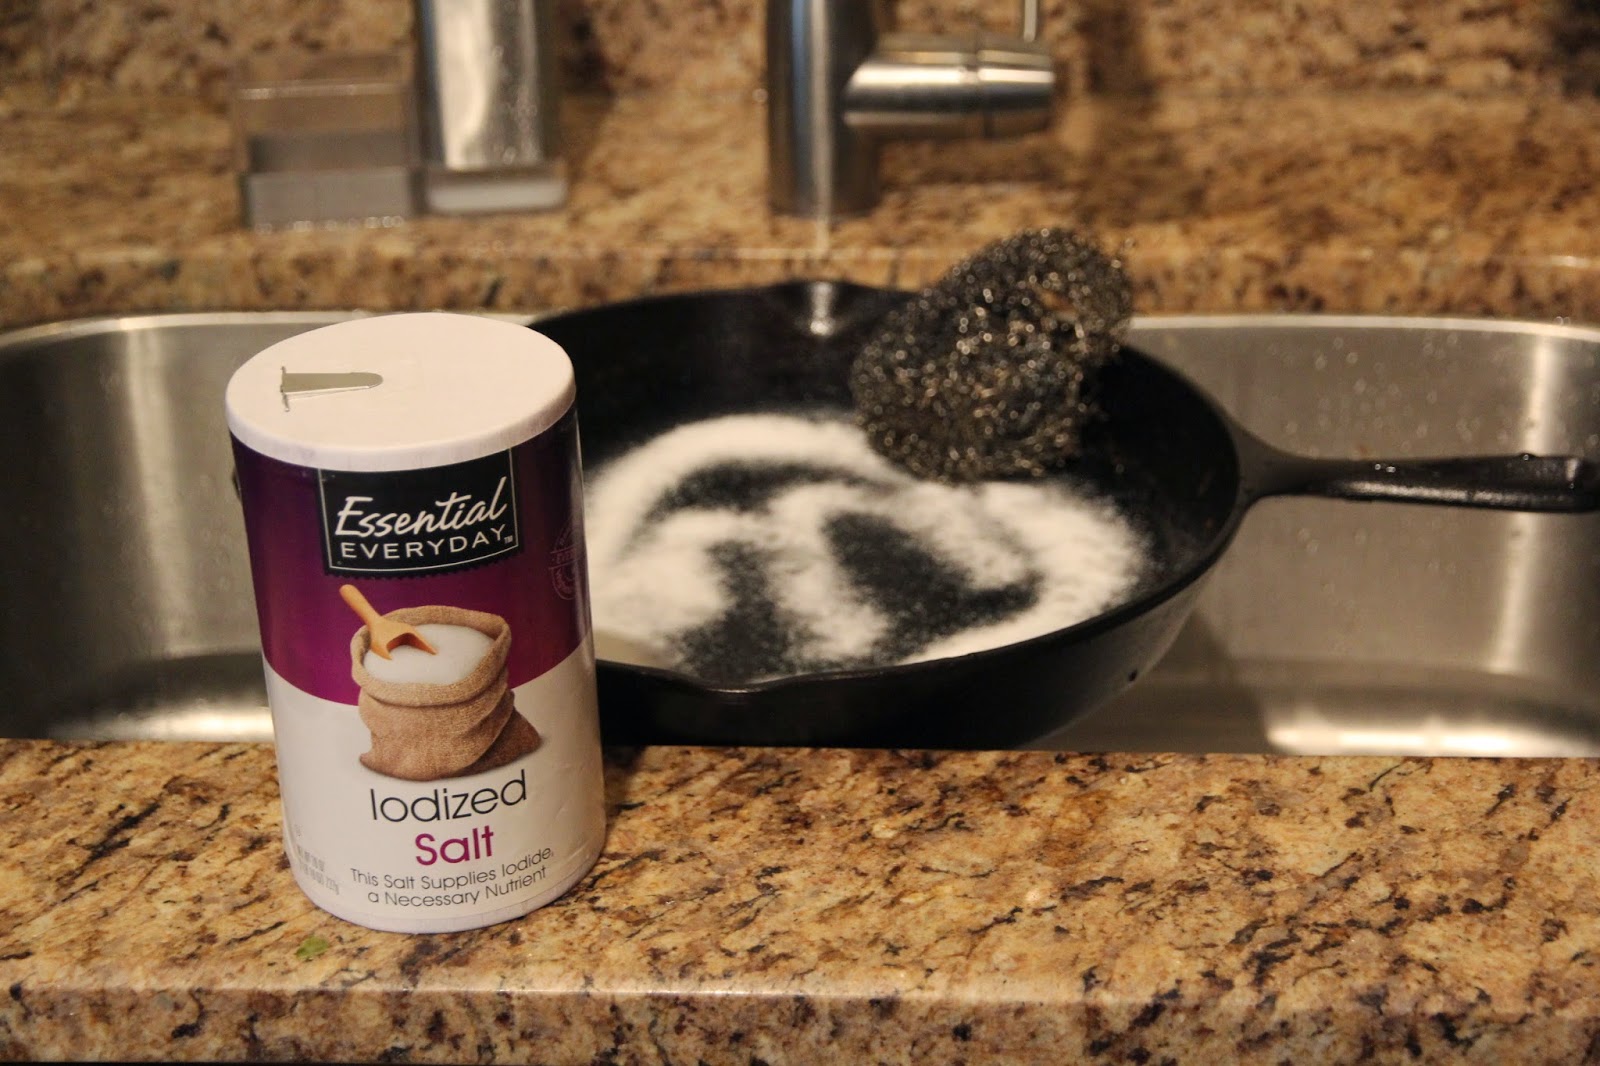
I just use cheap plain table salt, don't waste your good sea salt or kosher salt on this. After you're done cooking and the pan has cooled enough to handle, first rinse the pan out with hot water. After you've rinsed it and scraped off the big pieces with a spatula, sprinkle the salt liberally and start with your hands - rub it into the pan like you're giving it a salt scrub... which you are. The abrasiveness of the salt will scrape off any pieces of food that might be stuck. If you have any stubborn pieces you can use some iron wool, but it isn't usually necessary. Once you've scrubbed the salt all around and it's picked up all the pieces of whatever you cooked, just rinse thoroughly. 

They key then is after each time you use the pan, do a quick re-seasoning. It's likely that because all you used is salt, the pan is still a little greasy from whatever you cooked. This is a good thing! Just put the pan back on the stove, turn on a burner, and let it heat up for about 10-15 minutes. This will bake that layer of oil into the seasoning you've already started, and it will continue to help protect the pan. 

Now that you know the proper way to care for your cast iron pan, enjoy using it!! It's a phenomenal kitchen tool!! 


Sunday, August 24, 2014

Grilled Zucchini with Minted Lime Dressing

Mike grew up eating grilled zucchini that his dad would make "Greek style" which just means with olive oil and lemon juice. His dad would slice the zucchini lengthwise into long, thick strips, then drizzle with olive oil, salt and pepper, grill over high heat, then toss with lemon juice and a little more olive oil. Don't get me wrong, it's delicious. But I've recently found and adapted a recipe for grilled zucchini that... dare I say... I like even better! 

The inspiration for this recipe comes from a grilled squash and prosciutto recipe from Food & Wine's website that I made for Mike's 30th birthday party this year. But like most things I try to cook, I don't have all of the ingredients, so I adapt it to use whatever I have on hand. 

I started with 3 petite zucchini from the Madison farmer's market (which is my happy place, for the record). I sliced them on a bias on the mandolin between 1/8 and 1/4 inch thickness. Then I rubbed them down with olive oil, and Mike took them outside to grill them. While he was grilling, I made the dressing.
The dressing was so simple. I took the top 6 inches of 3 mint sprigs from my garden, and did a chiffonade on the leaves. This mint form my garden grew out of scraps. Last year I needed mint and what they had in the store was "living" herbs that still had a little root bulb. I bought no more mint from the store than what I used in this recipe, and it's grown into this bush you see here! 

Then since I didn't have lime zest, I used about 1 tbsp of lime juice from a bottle that I keep in the fridge. To that I added 1-2 tbsp of extra virgin olive oil, and about 1 tsp of garlic paste that I had in the fridge (if you remember from my garlic post, I had to go buy a tube of the stuff to do research, and I determined that it would be best to use in raw applications like dressings. So I put those cloves back and reached for the tube instead!). Otherwise I would have run 2 cloves through the garlic press. After adding a pinch of salt and pepper and giving it a good stir, the dressing was ready to go!

 And as long as I had the mint and the lime juice out, I whipped up a little mojito for myself... muddled mint with sugar and lime juice, add some rum, and simple syrup, and shake with ice. Pour into a glass with some soda water, and garnish with another fresh sprig of mint... it was the perfect dinner cocktail to compliment my zucchini.


 The last challenge is that I don't keep prosciutto laying around. That would be a crime... if I have prosciutto sitting in my fridge, it will be gone within 24 hours. But part of what makes this recipe so successful is the way that each of your different taste buds has something to do! Sweet from the zucchini and mint, sour from the lime, a little bitter from the pepper, umami from the garlic, and.... salt from the prosciutto! But without prosciutto, just adding some extra salt could have worked but it would have been lacking the extra umami that you get from the cured meat. So I scanned my fridge and found that I had some feta cheese - perfect!!! So after the zucchini was beautifully grilled, I drizzled on the dressing and tossed it all together. And lastly, took some of that salty feta and crumbled it into the smallest pieces possible and let it soften slightly over the hot zucchini. For a recipe that only took me a few minutes to throw together, this came out fantastic. I look forward to making it for a grill out we're having in a few weeks!